

Upcycle for Storage Container – Easy DIY!
Upcycle for a storage container

If you are like me, you probably have some cardboard boxes you do not need. So let’s use those boxes and upcycle for a storage container!
Just think of all the delivery boxes, boxes for food items you will throw out, or whatever boxes you had from items you bought. Also moving boxes you no longer want can be great. How to upcycle for a storage container can be a great way to save money; a fun craft; and a way to put the things you have (and may toss otherwise) to good use.
So here are a few ideas to get you started.
How to Upcycle a cardboard box into a cute storage container
Step 1 – The Box!
So first, look through boxes you have (or start thinking of the size you want). And then set aside that box once you have it. For three of these projects I did myself, I used two shipping boxes from Amazon and one empty tea bag box. Admittedly, after I did the steps I did below. But, it started as a regular teabag box!

Step 2 – Base Level Covering
Now, you need to decide on your base level covering. And what do I mean by this? Basically, what is it you want to be replacing the outside of the box, while keeping in mind any accents you may add, the purpose of it, and color scheme you are going for.
So, one easy way to do this is to glue on some craft paper to the outside sides of the box. And feel free to alternate colors.
For me, scrapbook paper works great with this. And here are some ideas of where to get it!!
But feel free to get creative!!
Next Step – The Lawyer to Upcycle for a Storage Container
To do this, measure your chosen medium by drawing a line with a pencil on the paper (ideally creasing it against the box or using a ruler). Then, try your best to cut a straight line.
But, if you have a paper cutter, this may be easier. Here is one example, but there are others (especially if you buy a craft supply kit; for example, I got mine with a laminator).
Step 3 – Glue on Your Base Level Cover
When you have cut out your paper (or fabric or even gluing rope on works), then it is time to get out the glue. For this, you can use spray on Elmer’s glue adhesive or use a glue stick.
Here is what I used. But, a glue stick would work. Just be careful not to go too heavy on any piece of the paper or it will bleed through.
If though, that happens, you can cover up with accents such as stickers, craft tape, drawings, etc.
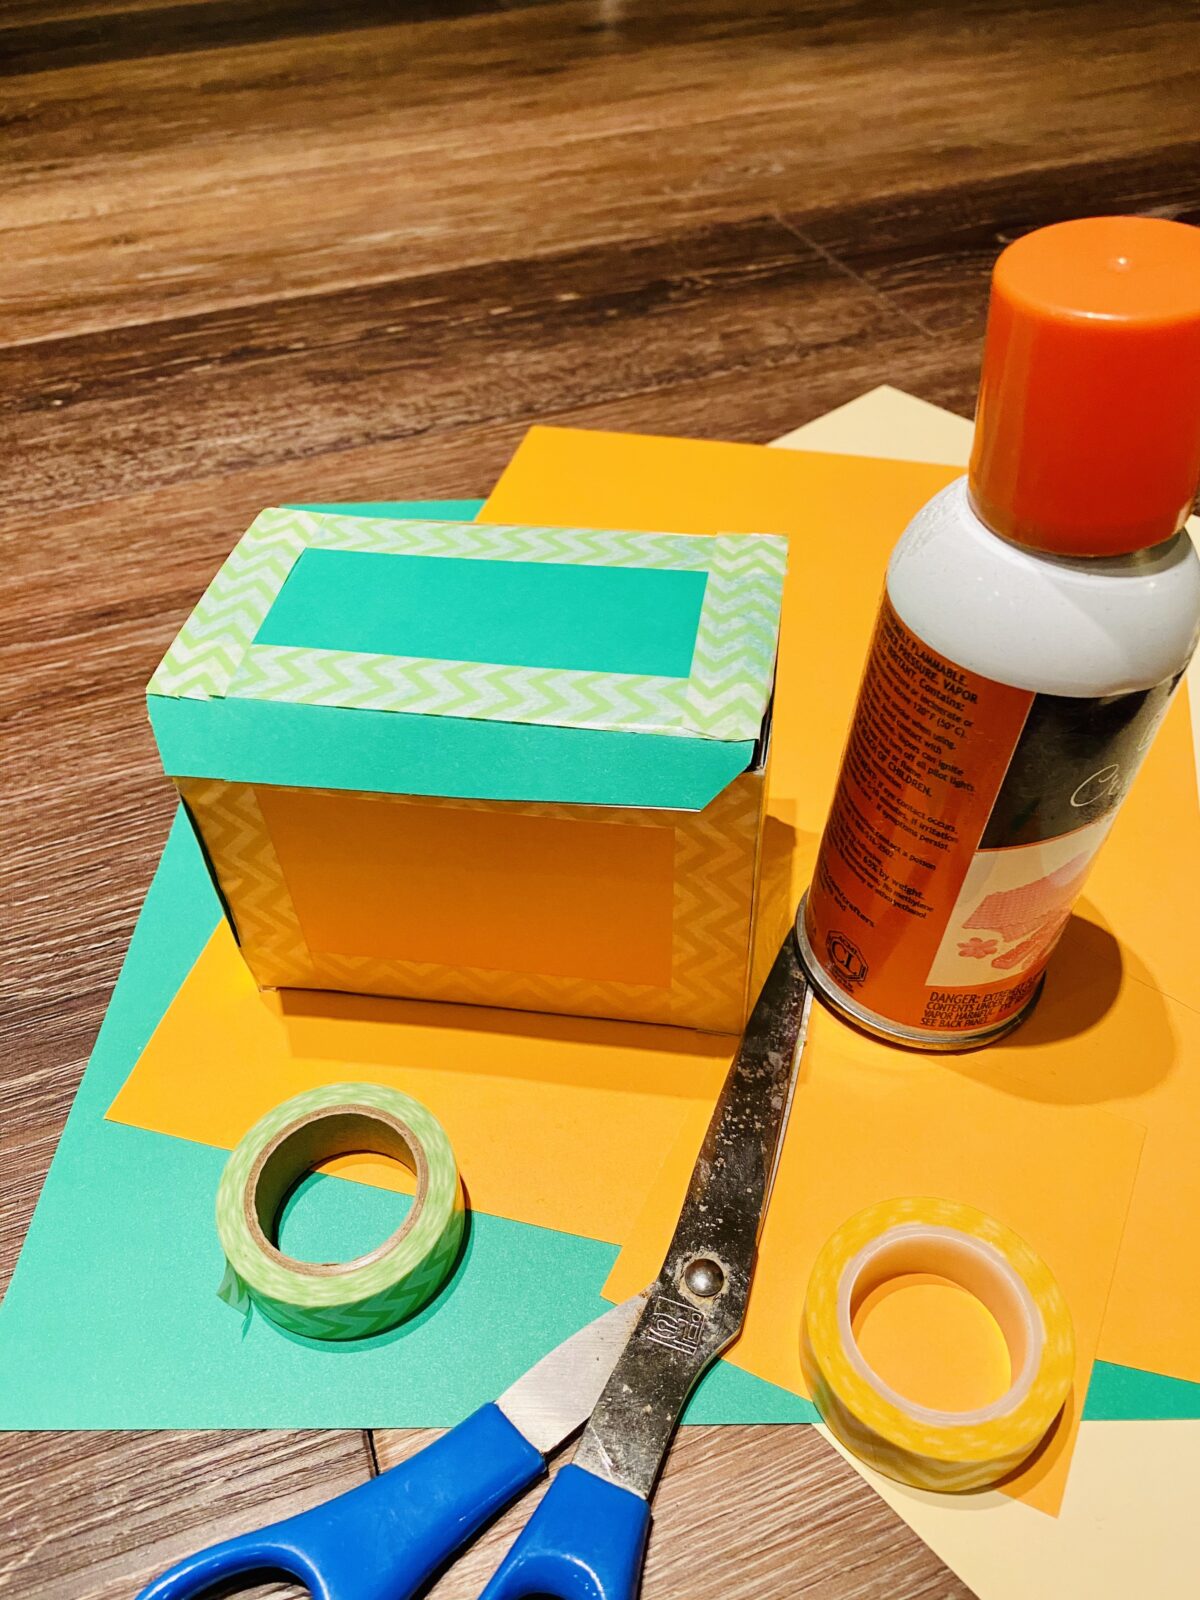
And here is my box for one of these projects with the materials.

Step 4
Now is a good time to cut off any unwanted pieces of the box, such as the top flaps (which I had to do for the shipping boxes and empty teabag box). However, with my teabag project, I left some of the top piece (almost lid) on it to serve as a little top closure.
Step 4.5 – optional
If you want the inside of the box to be covered in some type of material for your upcycle storage container, then now is the time to cut and glue on that material. Personally, I do not think it is necessary. However, you can also insert dividers too right now as another option for further organization.
And if you do not like the cardboard look but want some color, consider a light coat of acrylic paint.
Step 5 – Add Accents
Now, this is when I love using craft (or washi) tape such as what I used from this package available here:
So, I think the accents can really make a difference. And they can cover up any uneven lines or cuttings of the paper or other material you glued to the outside of the box. Also, any other little mistakes.
But, do not limit yourself. For example, you can add some stickers or labels or lace thread! Be fun with this part and think about how you will use the box.
Other ideas:
-Add a sticker label to the top or side of the box that says what it is.
-Add a cut out tag with a label to the side of the box with some string to write what is inside (think a gift type looking box).
Step 6
Now you have your upcycle storage container. But, always remember you can keep adding!!
Sometimes I have found that adding a piece of craft tape or ribbon can really make a difference. And you can try this project over and over again for a very minimal cost.
Another Upcycle Storage Container from a Shipping Box

But labels, and other items such as lace strings or little cut outs with personal handwriting can look great. As can stickers. And all of these can turn into a cute Valentine’s Day gift. Especially, with a fun lid like the easy empty teabag box one!
I have my tin cans decorated in this box. To learn how to make them, see this post.
Final thoughts
Save money by using cardboard boxes to upcycle into storage containers. This is really a fun project. And usually, you can find the supplies right around your home. Plus, it is a fun way to get organized.
For more ways to save money or to make money, check out these posts:
- Make Money – Master List of Ways to Make Money
- Save Money – List of Posts on Saving Time and Money
- Referral Codes for Apps and Websites – My Master List
And contact me with any questions!!
Habit Tracker!!!!!!!!
P.S. – I have a new Etsy listing on habit tracking that you can check out here.